
Blog
Setting Granite Countertops: A Complete Guide to Proper Installation

Published
2 days agoon

Table of Contents
ToggleSetting granite countertops is an important stage of a kitchen or bathroom renovation because granite is heavy, durable, and relatively unforgiving of installation mistakes. Unlike some lightweight countertop materials, granite slabs require careful preparation, accurate measurements, adequate cabinet support, and proper handling. A countertop may look perfectly positioned from above, yet problems such as uneven cabinets, insufficient support, incorrect seams, or poorly applied adhesive can eventually lead to movement, cracking, or an unsatisfactory finished appearance. Understanding the installation process before beginning the work can help homeowners, contractors, and DIY renovators make better decisions and avoid common problems.
Granite countertops can provide a high-end appearance while offering excellent resistance to everyday kitchen use when they are installed and maintained correctly. The process involves more than simply placing a slab on top of cabinets. The cabinets must provide a stable foundation, the countertop must be carefully positioned and leveled, seams must be handled properly, and the granite must be secured without creating unnecessary stress on the stone. This guide explains the major stages involved in setting granite countertops, from preparation and measuring to placement, leveling, securing, seam work, and final inspection.
What Does Setting Granite Countertops Mean?
Setting granite countertops refers to the process of positioning, leveling, securing, and finishing granite slabs after the supporting cabinets or base structures have been prepared. The term can include several different installation activities, depending on the project. These may include checking cabinet alignment, preparing the countertop base, transporting the granite into position, creating or joining seams, applying an appropriate adhesive, installing backsplashes, and making final adjustments.
Because granite slabs can be extremely heavy, installation should be approached as a structural task as well as a finishing task. The countertop needs continuous and reliable support in the areas where the manufacturer or installer specifies it, particularly around sinks, cooktops, overhangs, corners, and seams. The exact requirements vary according to the thickness and type of granite, cabinet construction, slab dimensions, cutouts, and overhang design. For large or complex installations, professional stone fabricators and installers are often better equipped to handle transportation and positioning safely.
Preparing Cabinets Before Setting Granite Countertops
One of the most important parts of setting granite countertops actually happens before the granite arrives. The cabinets must be installed securely and checked carefully for level, alignment, and stability. Granite follows the supporting surface, so placing an expensive stone slab over cabinets that are out of level can create installation problems. Before the countertop is installed, the cabinet boxes should be firmly connected, properly anchored, and checked across their entire length and width.
A long level can help identify high and low areas, while measurements across several points can reveal inconsistencies that might not be obvious visually. The tops of the cabinets should provide an appropriate supporting surface for the granite. If adjustments are necessary, they should generally be completed before the stone is positioned. Trying to correct significant cabinet problems after a granite slab has been installed can be difficult and may place unwanted stress on the stone.
The condition of the wall behind the countertop should also be considered. Walls are not always perfectly straight, particularly in older homes. Granite may be fabricated to specific measurements, but the installation area still needs to be carefully checked so that the countertop fits as intended. Depending on the project, small gaps against walls may later be covered by a backsplash or adjusted during finishing, but large discrepancies should be addressed before installation.
Measuring for Granite Countertops
Accurate measurements are essential when preparing for granite countertop installation. Measurements should account for the overall countertop dimensions, wall conditions, sink openings, cooktop cutouts, faucets, backsplashes, corners, seams, and any planned overhangs. A mistake in a measurement can be particularly costly because granite is generally fabricated before it reaches the installation site.
For this reason, professional fabricators commonly create detailed templates or use digital measuring systems for complicated projects. Homeowners working on a simple installation should still avoid relying on a single measurement. Measure relevant sections multiple times and verify the position of appliances, sinks, and plumbing fixtures before final fabrication.
Special attention should be given to corners and seams. A countertop that appears straightforward may require several pieces rather than one large slab because of the kitchen’s layout, transportation limitations, or the size of the available granite. Seams should be planned in locations that minimize their visual impact while also providing appropriate structural support.
Tools and Materials for Setting Granite Countertops
The exact equipment required depends on whether the project is being performed by professionals or experienced DIY installers. Common installation materials can include a suitable stone adhesive, silicone or caulk where appropriate, leveling materials, measuring tools, clamps for seam work, and cleaning supplies recommended for natural stone.
Handling equipment is equally important. Granite slabs are heavy and can be awkward to carry, so proper lifting equipment and enough people are necessary for safe movement. Gloves, appropriate footwear, and safe lifting practices can reduce the risk of injury, but personal protective equipment does not replace proper stone-handling procedures.
For cutting, grinding, polishing, or modifying granite, specialized equipment is normally required. These operations can generate stone dust and debris, and some cutting processes require appropriate dust-control methods and protective equipment. In many cases, it is safer and more economical to have the granite professionally fabricated rather than attempting major modifications at the installation site.
Step-by-Step Process for Setting Granite Countertops
1. Inspect the Installation Area
Before moving the granite into place, inspect the entire countertop area. Confirm that the cabinets are securely installed, the surfaces are properly aligned, and plumbing and electrical components that need access have been accounted for. Check that appliances and sink components will fit the planned openings.
This is also a good time to inspect the granite itself. Look for visible damage, chips, cracks, or fabrication problems before permanently securing the slab. If something appears incorrect, it is much easier to address the issue before the countertop has been installed.
2. Dry-Fit the Countertop When Appropriate
A dry fit allows the installer to position the granite without permanently securing it. This can help confirm that the slab fits the cabinets and walls as expected. The installer can check the alignment at corners, the position of sink and appliance openings, and the planned locations of seams.
Large granite pieces should never be forced into position. If the slab does not fit as expected, determine the cause before applying adhesive or attempting aggressive adjustments. Granite can withstand substantial everyday use, but concentrated force in the wrong location can damage the stone.
3. Check the Level
Once the granite is positioned appropriately, its level should be checked across the countertop. This step is especially important for long runs and areas where multiple slabs meet. The countertop should sit securely on the supporting structure without rocking or creating concentrated pressure points.
Minor adjustments may sometimes be made using appropriate shims or other approved methods, depending on the installation design. However, the goal should be to establish a stable support system rather than relying on excessive adhesive to compensate for poorly prepared cabinets.
4. Apply the Appropriate Adhesive
Once the fit and position have been confirmed, the granite can be secured using an adhesive system appropriate for the stone and cabinet material. Installers commonly use carefully placed beads or dabs rather than covering the entire underside indiscriminately. The adhesive should secure the countertop while allowing the stone to rest properly on its supporting structure.
The manufacturer’s or fabricator’s recommendations should take priority because adhesive requirements can differ based on the countertop system and installation conditions. Using too much adhesive does not necessarily make the countertop safer. Excess material can make future removal difficult and may interfere with proper positioning.
5. Set and Secure the Granite
The granite is then carefully lowered into its final position. This stage requires patience because granite is difficult to reposition once adhesive begins setting. The slab should be aligned with the cabinets, walls, sink opening, and adjacent countertop sections according to the installation plan.
Do not use excessive force to push, pry, or twist a granite slab into place. If alignment is significantly wrong, the safer approach is generally to lift and reposition the piece rather than forcing it. With large slabs, proper manpower and stone-handling equipment are particularly important.
6. Join and Finish Seams
If the countertop consists of multiple granite pieces, seams need careful attention. The adjoining edges should be clean and correctly aligned before the seam material is applied. Specialized seam-setting techniques and suitable color-matched materials can help create a cleaner transition between slabs.
A seam will normally remain somewhat visible because two separate pieces of stone are being joined. However, accurate fabrication, careful alignment, and professional finishing can make the transition considerably less noticeable. Seam placement also matters; areas with excessive stress, poor support, or frequent impact should be avoided when planning the layout.
7. Install the Sink and Other Fixtures
Depending on the countertop design, sinks may be installed before or during the countertop installation process. Undermount sinks require particularly careful positioning because they are attached beneath the granite and must be properly supported and sealed according to the installation system.
Faucets and other fixtures should also be aligned with the prepared openings. Plumbing connections should be completed carefully without putting pressure on the granite. Never use countertop openings as leverage points when connecting plumbing components.
How to Support Granite Countertops
Adequate support is one of the most important considerations when setting granite countertops. The exact support requirements depend on the stone thickness, slab dimensions, cabinet configuration, cutouts, and overhangs. Large unsupported areas can create stress concentrations, particularly around sink openings and countertop edges.
Overhangs deserve special attention. A granite overhang extending beyond the cabinets may require brackets, corbels, steel supports, or another engineered support system. The amount of support required should not be guessed solely from the appearance of the countertop. The stone fabricator or a qualified installer can determine an appropriate support arrangement based on the specific design.
Islands are another area where support planning is particularly important. An island may contain a large overhang designed for seating, and the cabinet structure beneath it may not extend to the entire edge of the granite. Proper structural support should therefore be planned before fabrication and installation rather than added as an afterthought.
Common Mistakes When Setting Granite Countertops
One common mistake is installing granite over cabinets that are not adequately level or stable. Because granite is rigid, it cannot simply flex to accommodate every irregularity in the supporting structure. Preparing the cabinets correctly can prevent unnecessary stress and make the final countertop easier to install.
Another mistake is attempting to move a large granite slab without enough people or appropriate equipment. Granite is heavy and can be difficult to control, especially when navigating doorways, corners, and cabinets. A dropped or improperly supported slab can cause serious injury as well as expensive property damage. Professional installers have specialized techniques for transporting and positioning large pieces.
Using the wrong adhesive or applying adhesive without considering the countertop’s support structure can also create problems. Adhesive should complement a properly prepared installation rather than compensate for inadequate support. Similarly, excessive force during installation can damage corners and edges, which are often among the most vulnerable areas of a granite slab.
Can You Install Granite Countertops Yourself?
Some experienced DIY renovators may be able to handle simple countertop installation, particularly when the granite has already been professionally measured and fabricated. However, the weight and fragility of large stone slabs make this different from installing many other countertop materials. Handling, transportation, leveling, seam work, sink installation, and support requirements can all introduce complications.
Professional installation is especially worth considering when the project involves large slabs, multiple seams, unusual shapes, extensive overhangs, complicated sink cutouts, or difficult access. A qualified installer can also identify structural issues before they result in damage. For homeowners, professional installation can provide greater assurance that the countertop has been handled and secured correctly.
How to Maintain Granite After Installation
After setting granite countertops, proper maintenance can help preserve their appearance and performance. Granite should generally be cleaned using products appropriate for natural stone. Harsh or inappropriate chemicals can potentially damage the finish or leave unwanted residue, depending on the stone and its protective treatment.
Spills should be cleaned reasonably promptly, particularly substances that can stain porous natural stone. The sealing requirements of granite vary according to the particular stone, its porosity, and the sealer used. Rather than following a universal resealing schedule, homeowners should follow the recommendations of the stone supplier or sealer manufacturer and evaluate the countertop’s condition over time.
Regular cleaning should also include attention to areas around sinks and seams. Keeping these areas clean and dry can help prevent buildup and make it easier to notice any changes that might require attention.
Granite Countertop Installation Cost Factors
The cost of installing granite countertops can vary substantially depending on the stone itself, countertop size, edge profile, number of slabs, fabrication requirements, sink and cooktop cutouts, seams, backsplash work, transportation, and labor. Geographic location and installer experience can also affect the final price.
It is useful to request a detailed quotation rather than comparing only the price per square foot. Two granite countertop projects with similar surface areas can have very different fabrication and installation requirements. A quote should ideally clarify what is included, such as measurement, templating, fabrication, edge finishing, cutouts, transportation, installation, seams, and sealing.
Tips for a Successful Granite Countertop Installation
Planning is the foundation of a successful installation. Before the granite is fabricated, verify cabinet dimensions, appliance locations, sink specifications, backsplash plans, overhangs, and seam positions. Any changes made after fabrication may be difficult or expensive to correct.
It is also important to communicate clearly with the fabricator and installer. Provide accurate appliance and sink information and ask how the countertop will be supported. If you are planning a large island or seating overhang, discuss the support requirements before the stone is ordered.
Finally, avoid rushing the actual installation. Granite is an expensive material, and a few additional minutes spent checking alignment, level, support, and seam positioning can prevent much larger problems later. The objective is not simply to place the granite on the cabinets but to create a stable, properly supported, attractive countertop that can perform reliably for years.
Conclusion
Setting granite countertops requires careful preparation, accurate measurements, proper cabinet support, safe handling, precise positioning, and appropriate securing methods. Although granite is known for its strength and durability, even a strong natural stone can be damaged when it is poorly supported, forced into position, or handled incorrectly. Preparing the installation area before the slab arrives is therefore just as important as the final placement itself.
For straightforward projects, an experienced DIY installer may be able to participate in the installation, particularly when the granite has been professionally measured and fabricated. More complicated installations involving large slabs, multiple seams, sink cutouts, islands, or substantial overhangs are often better handled by experienced professionals. By focusing on proper preparation, structural support, careful handling, and appropriate maintenance, homeowners can get the most from their granite countertops and enjoy a durable, attractive finished surface.
Frequently Asked Questions About Setting Granite Countertops
1. What is the best way to set granite countertops?
The best approach is to ensure that the cabinets are secure and level, verify the granite’s fit, position the slab carefully, provide appropriate support, and secure it using an adhesive system suitable for the installation. Large or complicated slabs should generally be handled by experienced installers.
2. Do granite countertops need to be glued down?
Granite countertops are commonly secured to the supporting cabinets or substrate using an appropriate adhesive system. The exact method depends on the countertop design and installation system, so the fabricator or installer should follow the applicable recommendations.
3. Do cabinets need to be perfectly level for granite?
Cabinets should be properly aligned, stable, and sufficiently level before granite is installed. Significant irregularities can create stress on a rigid stone countertop and may lead to installation problems.
4. How long does it take to install granite countertops?
Installation time varies according to the size and complexity of the project. A relatively simple kitchen may be completed in a day, while projects involving multiple slabs, complicated seams, islands, backsplashes, or extensive adjustments can require additional time.
5. Can granite countertops crack during installation?
Yes. Granite can crack if it is improperly handled, inadequately supported, subjected to concentrated stress, or forced into position. Proper transportation, support, fabrication, and installation techniques reduce the risk.
6. How much overhang can granite countertops have without support?
There is no single universal overhang limit because the safe amount depends on factors such as slab thickness, stone characteristics, support structure, countertop dimensions, and intended use. A fabricator or qualified installer should determine the appropriate support for the specific design.
7. Should granite be sealed after installation?
Many granite countertops benefit from sealing, but the need and timing depend on the particular granite and the treatment already applied by the fabricator. Follow the stone supplier’s and sealer manufacturer’s recommendations.
8. Can you install granite countertops yourself?
Experienced DIYers may be able to handle certain straightforward installations, but granite slabs are heavy and can be difficult and dangerous to move. Professional installation is generally advisable for large slabs, complex layouts, seams, sink cutouts, and unsupported overhangs.
9. What should you put under granite countertops?
Granite normally rests on an appropriately prepared cabinet or supporting structure. Depending on the design, additional support may be needed in areas such as overhangs, islands, sink openings, and other locations where the normal cabinet structure does not provide sufficient support.
10. How do you keep granite countertops looking new?
Clean granite regularly with products suitable for natural stone, wipe spills promptly, avoid inappropriate harsh chemicals, and maintain the stone’s protective treatment according to the recommendations for that particular grani
You may like
Blog
Changing Oil on Toyota Tundra: Complete Step-by-Step DIY Guide
Published
1 week agoon
September 9, 2026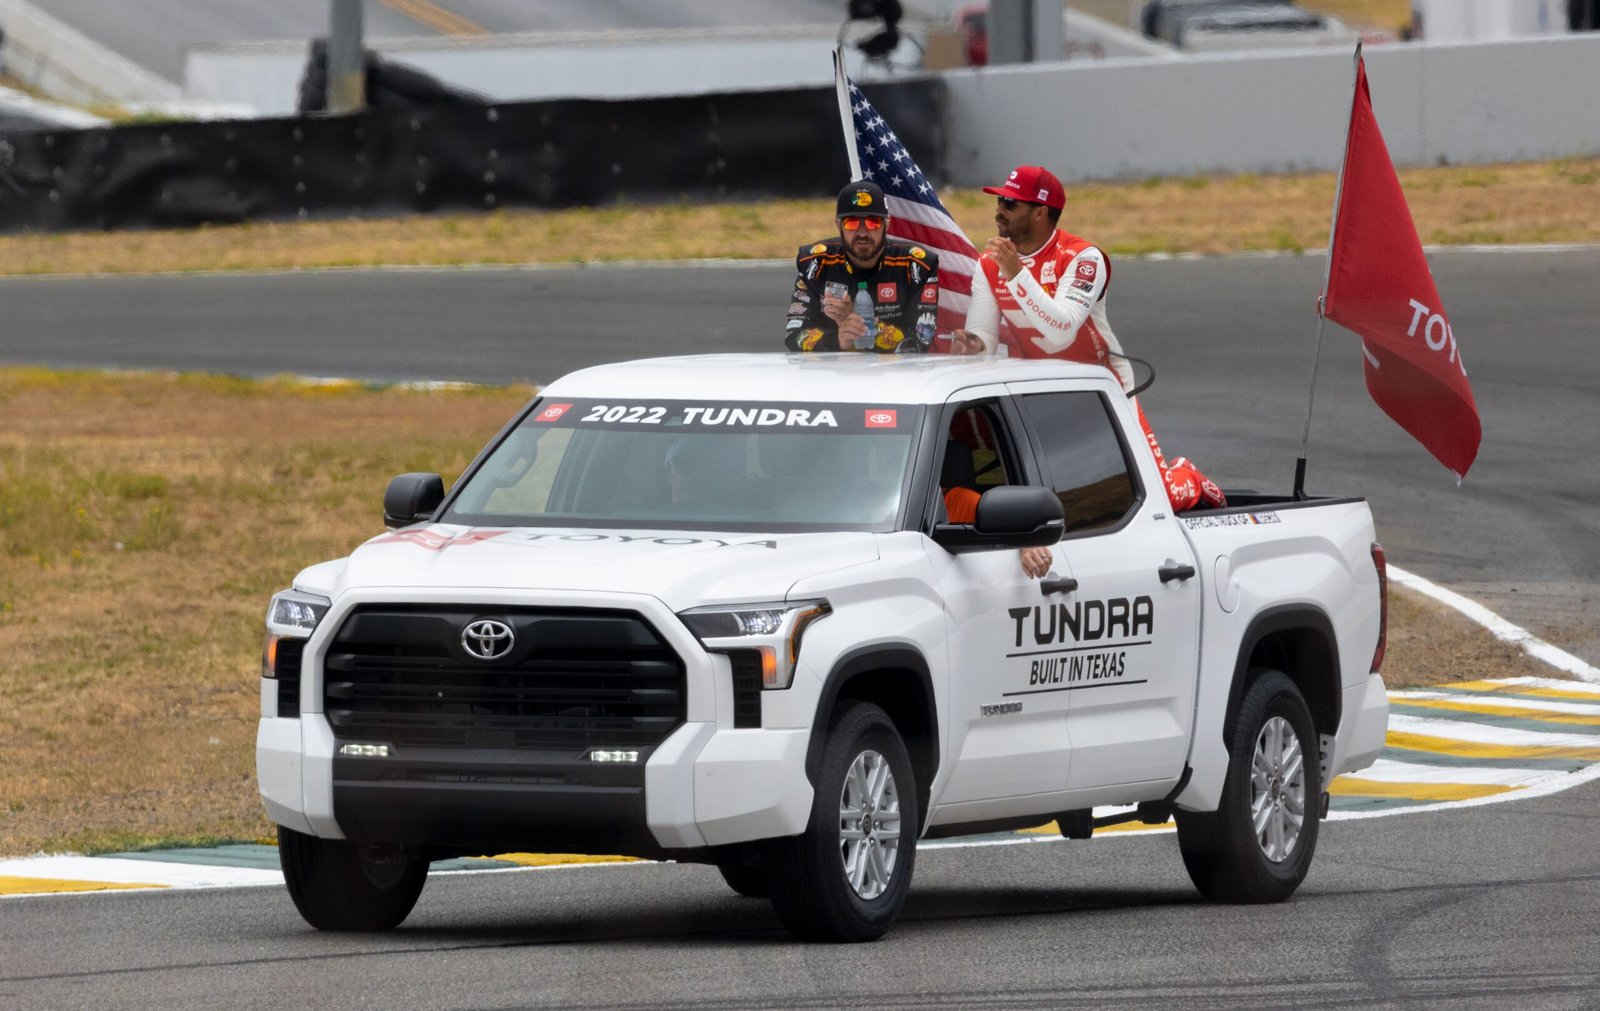
Table of Contents
ToggleChanging oil on a Toyota Tundra is one of the most important routine maintenance jobs you can perform to help keep the truck’s engine properly lubricated and operating reliably. Whether you own an older Tundra or a newer generation, regular engine-oil maintenance helps remove contaminants, protect internal components, and maintain proper lubrication under different driving conditions. A Tundra is often used for towing, hauling, commuting, off-road driving, or a combination of these activities, so keeping up with oil service is especially important. The exact oil type, oil capacity, filter specification, and recommended service interval depend on the model year and engine, which means you should always verify those details in the owner’s manual or Toyota maintenance information before beginning the job.
For many owners, a Toyota Tundra oil change can be completed at home with basic tools, a suitable drain pan, a replacement oil filter, the correct engine oil, and enough time to work carefully. The process itself is straightforward, but doing it correctly matters. You need to safely raise and support the truck if necessary, allow the old oil to drain completely, replace the filter and drain-plug sealing component when required, refill the engine with the correct amount and specification of oil, and check carefully for leaks. This guide explains the general process of changing oil on a Toyota Tundra while highlighting the areas where specifications can differ between Tundra engines and model years.
Why Regular Oil Changes Matter for a Toyota Tundra
Engine oil performs several important jobs inside a Toyota Tundra engine. Its primary purpose is to provide lubrication between moving components, reducing friction and helping limit wear. Engine oil also helps carry heat away from certain internal components, keeps contaminants suspended so they can be removed by the oil filter, and contributes to keeping internal engine parts clean. As oil ages, its properties can gradually change, and contaminants can accumulate. That is why simply checking the oil level is not a substitute for performing regular oil changes.
The importance of maintenance can be even greater when a Tundra is subjected to demanding use. Frequent towing, heavy loads, dusty environments, repeated short trips, extensive idling, and severe operating conditions can place additional demands on the engine and its lubrication system. Drivers who regularly use their Tundra for these purposes should pay close attention to Toyota’s maintenance recommendations for their specific vehicle. Rather than relying on a generic mileage number found online, use the service schedule applicable to your model year, engine, driving conditions, and market.
What You Need Before Changing Oil on a Toyota Tundra
Before starting a Toyota Tundra oil change, gather everything you need so you do not have to stop halfway through the job. You will generally need the correct engine oil, a compatible replacement oil filter, a drain pan with sufficient capacity, a wrench or socket that fits the drain plug, a filter-removal tool if necessary, a funnel, gloves, shop towels or rags, and a suitable container for transporting the used oil to a recycling facility. If the truck needs to be raised to access the drain plug, use equipment rated for the vehicle’s weight and support the truck with properly positioned jack stands. Never rely solely on a hydraulic jack while working underneath a vehicle.
The most important preparation step is confirming the specifications for your particular Tundra. Different generations and engines can require different oil viscosities, oil capacities, filters, and procedures. Check the owner’s manual before purchasing supplies, particularly if you are unsure whether your truck requires a particular SAE viscosity or an oil meeting a specific performance standard. You should also confirm the correct filter and drain-plug sealing washer or gasket where applicable. Preparing the correct parts before beginning makes the job safer and reduces the possibility of accidentally installing an incompatible component.
How to Change Oil on a Toyota Tundra
1. Park the Tundra on a Safe, Level Surface
Begin by parking the Tundra on a level and stable surface. Engage the parking brake and make sure the truck is secure before working around or underneath it. If you need additional clearance, use appropriate ramps or a properly rated jack and jack stands according to safe lifting procedures. Never crawl underneath a vehicle that is supported only by a jack.
Starting with a warm engine can help the oil flow more easily because warm oil generally drains more readily than cold oil. However, the engine and exhaust components can become extremely hot, so avoid working immediately after a long drive. Allow the vehicle to cool enough that you can safely work around the engine and oil-drain area without risking burns.
2. Locate the Oil Drain Plug
Once the truck is safely positioned, identify the engine oil drain plug underneath the vehicle. Depending on the generation and engine configuration, access to the drain plug and oil filter can differ. Place the drain pan underneath the drain area before loosening the plug because the initial flow of oil can move outward quickly.
Using the correct-size wrench or socket, carefully loosen the drain plug. Keep pressure on the tool as you loosen it so you do not accidentally round the fastener. Once the plug is loose enough to remove by hand, position your hand to control it while keeping the drain pan underneath. Be prepared for the oil to begin flowing as soon as the plug comes out.
3. Let the Old Engine Oil Drain
Allow the old oil to drain into the pan. Give it sufficient time to drain rather than immediately reinstalling the drain plug after the first few seconds. Tilting or moving the truck is generally unnecessary and should not be attempted if it compromises the vehicle’s stability.
While the oil is draining, inspect the drain plug and its sealing washer or gasket. Look for damaged threads, unusual metal debris, or a worn sealing component. A damaged drain plug or sealing washer can contribute to leaks after the oil change. If Toyota specifies replacing the sealing washer for your particular application, install a new one rather than reusing a questionable old component.
4. Replace the Toyota Tundra Oil Filter
Replacing the Toyota Tundra oil filter at the same time as the engine oil is an important part of a complete oil service. The filter removes particles and contaminants from the circulating oil, so installing a fresh filter allows the new oil to remain cleaner during the next service interval.
Remove the old filter carefully and keep the drain pan positioned underneath because oil may continue to flow from the filter housing or filter location. Before installing the new filter, compare it with the old component to make sure the size and configuration appear correct. Follow the filter manufacturer’s installation instructions and Toyota’s recommendations for tightening. If the filter uses a rubber sealing gasket, lightly lubricating the gasket with clean engine oil before installation is commonly recommended, but always follow the instructions for the specific filter.
5. Reinstall the Drain Plug Correctly
After the old oil has drained and the filter has been replaced, clean the drain-plug area and reinstall the plug with the appropriate sealing component. Tighten it according to the torque specification for your exact Tundra application. Correct torque is important because overtightening can damage threads or components, while insufficient tightening can allow oil to leak.
Avoid guessing the torque specification when a manufacturer specification is available. The correct value can vary depending on the engine and model year. A torque wrench is therefore a valuable tool for anyone who performs their own maintenance regularly.
6. Add the Correct Toyota Tundra Oil
Now add the appropriate new engine oil through the oil-filler opening on top of the engine. The exact Toyota Tundra oil type and quantity depend on the engine and model year, so verify the required specification before pouring oil into the engine. Do not automatically use the capacity listed for another Tundra simply because the trucks look similar or belong to the same generation.
Add most of the required oil first rather than immediately pouring in the entire stated capacity. After allowing the oil to settle, check the dipstick according to the procedure in your owner’s manual and gradually add more oil as needed. This approach reduces the risk of accidentally overfilling the engine.
How to Check the Oil Level After an Oil Change
Checking the oil level is one of the most important final steps when changing oil on Toyota Tundra. After adding the initial amount of oil, make sure the vehicle is on a level surface and follow the manufacturer’s instructions for checking the oil level. Depending on the particular Tundra, the checking procedure may involve allowing the engine to sit for a specified period after shutting it off.
Remove the dipstick, wipe it clean, reinstall it fully, and then remove it again to inspect the level if your vehicle is equipped with a conventional dipstick. The oil should fall within the indicated operating range. Add small amounts if necessary rather than adding a large quantity at once. Overfilling an engine can also cause problems, so the goal is to reach the appropriate level rather than simply adding as much oil as possible.
Check for Oil Leaks
Once the oil level is correct, start the engine and let it run briefly while observing the oil-pressure warning indicators and listening for anything unusual. Then shut the engine off and inspect the drain-plug and oil-filter areas for signs of leakage. If you see fresh oil dripping, turn the engine off and determine the source before driving the vehicle.
After the inspection, allow the oil to settle and recheck the level according to the instructions for your Tundra. This final check is useful because some oil will have circulated through the filter and lubrication system after the engine has run. Keep monitoring the area underneath the truck during the first drive and afterward for any evidence of leakage.
How Often Should You Change Toyota Tundra Oil?
The Toyota Tundra oil change interval is not necessarily identical for every model. Recommended intervals can depend on the model year, engine, oil specification, driving conditions, and maintenance schedule. Modern vehicles may have different recommendations from older Tundras, and severe operating conditions can affect maintenance requirements.
Rather than using a universal interval from a generic website, consult the owner’s manual and official maintenance schedule for your exact truck. Keeping records of each service can also make maintenance easier. Write down the date, mileage, oil specification, filter used, and any other relevant work performed. A simple maintenance record can help you determine when the next service is due and can be useful if you eventually sell the truck.
Common Mistakes to Avoid During a Tundra Oil Change
One of the most common mistakes when performing a Toyota Tundra DIY oil change is using the wrong oil specification or assuming that every Tundra takes the same oil. Engine technology changes between generations, so the correct oil for one truck may not be the correct choice for another. Another mistake is failing to replace the oil filter, reusing a damaged sealing washer, or tightening the drain plug incorrectly. These seemingly small details can lead to leaks or other maintenance problems.
Another frequent mistake is relying on the oil bottle’s stated quantity without checking the dipstick or manufacturer’s procedure. Oil capacity figures should be treated as a specification to verify rather than an instruction to pour the entire amount into the engine without checking. It is also important to dispose of used oil responsibly. Used motor oil should never be poured onto the ground, into a drain, or into household garbage. Take it to an appropriate oil-recycling or collection facility where available.
Tips for Making Your Tundra Oil Change Easier
A little preparation can make an oil change much cleaner and faster. Lay out the new filter, oil, tools, drain pan, gloves, towels, and replacement sealing components before beginning. Keep the new oil containers somewhere clean and stable, and make sure the drain pan is positioned correctly before removing the drain plug. A funnel can significantly reduce spills around the oil-filler opening.
It is also helpful to inspect other visible components while you are underneath the truck. You can look for obvious fluid leaks, damaged components, worn belts where visible, tire-related issues, or anything else that appears unusual. However, an oil change should not become an excuse to perform unfamiliar repairs underneath a vehicle without proper knowledge and safety equipment. If you discover a serious leak, damaged fastener, or other mechanical problem, consider having the truck inspected by a qualified technician.
When You Should Have a Professional Change the Oil
Although changing oil on a Toyota Tundra is manageable for many experienced DIY owners, professional service can be the better option if you lack a safe place to raise the truck, do not have the necessary tools, or are uncomfortable working underneath a large pickup. A professional technician can also identify other maintenance issues while performing the oil service.
Professional service may be particularly useful if the drain plug is damaged, the oil filter is stuck, there is an existing leak, or you discover damaged components underneath the vehicle. Saving money on an oil change is not worth taking unnecessary safety risks. The most important part of DIY maintenance is knowing when a job is within your abilities and when professional equipment or expertise is appropriate.
Conclusion
Changing oil on Toyota Tundra is an important maintenance task that can be performed at home when you have the correct supplies, appropriate tools, and a safe working environment. The basic process involves warming the engine appropriately, safely accessing the underside of the truck, draining the old oil, replacing the oil filter, reinstalling the drain plug with the proper sealing component and torque, adding the manufacturer-specified oil, checking the level, and inspecting carefully for leaks. Completing each step carefully is more important than trying to finish the job as quickly as possible.
The most important thing to remember is that Toyota Tundra specifications vary by model year and engine. Always verify the correct oil type, capacity, filter, drain-plug requirements, torque specifications, and maintenance interval for your particular vehicle before beginning. With proper preparation and attention to detail, a routine Tundra oil change can become a straightforward part of your regular truck-maintenance routine while helping you keep better track of the vehicle’s overall condition.
Frequently Asked Questions
How often should I change the oil in my Toyota Tundra?
The appropriate oil-change interval depends on the Tundra’s model year, engine, oil specification, and driving conditions. Check the maintenance schedule and owner’s manual for your specific vehicle rather than relying on a universal interval.
What oil does a Toyota Tundra take?
The required oil viscosity and specification depend on the specific Tundra engine and model year. Check the owner’s manual or applicable Toyota maintenance information before purchasing oil.
Do I need to change the oil filter every time?
Replacing the oil filter during a regular oil change is generally recommended because the filter collects contaminants from the engine oil. Use a filter that is specifically compatible with your Tundra.
Can I change Toyota Tundra oil myself?
Yes, many owners can perform a Tundra oil change themselves if they have the appropriate tools, knowledge, and a safe working area. The vehicle must be securely supported whenever you need to work underneath it.
How do I know if I put too much oil in my Tundra?
Check the oil level using the manufacturer’s recommended procedure and the dipstick, where equipped. If the level is above the specified range, do not simply continue driving and hope it corrects itself; address the overfill appropriately.
Should I change the oil before or after a long towing trip?
Following the manufacturer’s maintenance schedule is the starting point. If your Tundra is regularly used for towing or other severe operating conditions, check the applicable maintenance guidance because demanding use can affect service requirements.
What should I do with the old Toyota Tundra oil?
Collect used oil in a clean, suitable container and take it to an appropriate used-oil recycling or collection location. Never pour used motor oil onto the ground or into household drains.

Table of Contents
ToggleReceiving an unexpected phone call can immediately raise questions, particularly when the number is unfamiliar and you do not recognize the person, company, or organization attempting to contact you. One such number that people may search for after seeing it on their phone is 44 800 009 3806. When an unfamiliar number appears, the natural reaction is to search for the number online, check whether other people have reported it, and determine whether there is a legitimate reason for the call. However, it is important to approach an unknown number carefully because the appearance of a number alone does not always reveal who is behind a call or why the caller contacted you.
The number 44 800 009 3806 can therefore be used as a starting point for a broader investigation rather than as proof of a particular company’s identity. People searching for this number may want to know whether it is a genuine business contact, a customer-service number, a marketing call, a survey, an automated call, or potentially an unwanted or suspicious communication. The most sensible approach is to avoid making assumptions and instead look at the circumstances surrounding the call, including whether a voicemail was left, whether the caller provided identifying information, whether the call was expected, and whether the caller asked for sensitive information. This guide explains what you should consider when researching 44 800 009 3806 and how to respond safely if the number contacts you.
What Is 44 800 009 3806?
The first thing to understand when researching 44 800 009 3806 is that the number itself does not automatically establish the identity of the caller. The +44 country code is associated with the United Kingdom, while numbers beginning with 0800 are commonly associated with UK freephone services. Because the number is presented in the international format 44 800 009 3806, someone receiving the call may see it differently depending on their phone, network provider, location, or caller-ID system. A number’s format can provide useful information, but it should not be treated as confirmation that a particular company or organization is calling.
When searching for 44 800 009 3806, it is also important to distinguish between information that can be verified and information that is simply repeated online. Phone-number websites, discussion boards, social media posts, and search results can sometimes contain reports from people who received calls from the same number, but those reports may not always establish who actually made the call. Caller ID can also be manipulated or spoofed, meaning that the number displayed on a phone may not necessarily represent the true originating number. For that reason, a responsible phone-number lookup should focus on evidence and verification rather than immediately labeling an unfamiliar caller as legitimate or fraudulent.
Why People Search for 44 800 009 3806
There are several reasons someone might search for 44 800 009 3806 after receiving a call. The most common reason is simply that the number is unfamiliar. When a person sees a missed call without a voicemail, they may want to know whether they should return it or ignore it. Other people may have answered the call but received an automated message, experienced silence, or heard a caller introduce themselves as representing a business. In these situations, searching the number can help the recipient decide what to do next while avoiding unnecessary risks.
Another reason people search for 44 800 009 3806 is because they may have received a call connected with an account, delivery, financial service, subscription, appointment, insurance matter, or another service they already use. An unfamiliar number can become particularly confusing when the caller claims to represent an organization that the recipient recognizes. Rather than relying solely on the caller’s statement, it is better to independently locate the organization’s official contact information and make contact through a trusted channel. This simple step can help distinguish a genuine communication from an attempt to obtain personal information.
Is 44 800 009 3806 a Legitimate Number?
It is not possible to determine legitimacy simply from the number 44 800 009 3806 itself. A phone number can look professional, use a UK-format number, or appear to belong to a freephone range while still requiring independent verification. Conversely, an unfamiliar number should not automatically be considered fraudulent merely because the recipient does not recognize it. Legitimate organizations sometimes call customers from numbers that are not already saved in their contacts, particularly when calls are made through outsourced contact centers, automated systems, or different departments.
The best way to evaluate an unexpected call is to consider what the caller says and what they ask you to do. A legitimate organization should generally be able to identify itself clearly and provide a reasonable explanation for contacting you. If the caller asks you to provide passwords, complete security codes, disclose banking credentials, transfer money urgently, install unfamiliar software, or follow a suspicious link, you should stop the conversation and verify the request independently. Never assume that a caller is genuine simply because they know some basic information about you.
What Should You Do If 44 800 009 3806 Calls You?
If 44 800 009 3806 appears on your phone, you do not have to answer immediately. If you are unsure about the number, allowing the call to go to voicemail can be a useful first step. A legitimate caller who genuinely needs to reach you may leave a message explaining the purpose of the call and providing appropriate contact information. You can then assess the message without having to make an immediate decision while speaking to an unfamiliar person.
If you answer the call, avoid providing sensitive information until you have confirmed the caller’s identity. You can ask the caller for their name, department, organization, and reason for calling, but remember that information supplied during the call should still be independently verified. If the caller claims to represent a bank, retailer, government organization, telecommunications company, delivery service, or another business, find the organization’s official website or use documentation you already possess and contact the organization through an independently obtained number. This is much safer than relying on a telephone number supplied by the unexpected caller.
Should You Call 44 800 009 3806 Back?
Whether you should call 44 800 009 3806 back depends on the circumstances. If you have no idea why someone would be calling you and there is no voicemail or other explanation, there is usually no need to rush into returning the call. An unanswered call does not automatically mean that immediate action is required. Take time to determine whether the number is associated with a service you use or an organization you were expecting to hear from.
If the caller left a message claiming to represent a company, verify the claim independently before returning the call. Instead of using a callback number provided in an unexpected message, locate the company’s official contact details yourself. This approach is especially important if the caller mentions financial matters, account security, payments, refunds, passwords, verification codes, or urgent deadlines. Taking a few extra minutes to verify the communication can prevent an avoidable mistake.
How to Check an Unknown Phone Number Safely
Searching 44 800 009 3806 online can be useful, but search results should be interpreted carefully. Look for multiple independent reports rather than relying on a single comment or website. Pay attention to whether people describe similar experiences, such as repeated automated calls, marketing messages, silent calls, or claims from a particular organization. However, even several online reports do not necessarily prove the identity of the caller because telephone numbers can be reassigned, shared between services, or spoofed.
You should also consider the timing of the call. If you recently contacted a company, placed an order, requested support, scheduled an appointment, or submitted an application, an unfamiliar number could potentially be connected to that activity. On the other hand, if the caller contacted you unexpectedly and immediately requested sensitive information or pressured you to act, greater caution is appropriate. Context is one of the most useful tools for evaluating an unknown number because it allows you to compare the call against events you can independently verify.
Warning Signs to Watch For
When dealing with 44 800 009 3806 or any other unfamiliar phone number, certain behaviors deserve additional caution. Urgency is one of the most important warning signs. Be careful if a caller insists that you must make a payment immediately, provide a verification code within minutes, transfer money to protect an account, or keep the conversation secret. Pressure is often used to prevent people from taking the time to independently check the caller’s identity.
Another warning sign is a request for information that the caller should not reasonably need. Never casually provide passwords, complete authentication codes, card security information, or other highly sensitive credentials to an unexpected caller. If you are uncertain, end the call and contact the organization through a trusted official channel. A genuine organization can generally explain how you can verify the request without requiring you to blindly trust an incoming call.
What If You Already Answered the Call?
If you already answered a call from 44 800 009 3806, there is no reason to panic simply because you answered. The important question is what happened during the conversation. If the caller only introduced themselves and you did not provide sensitive information, you can simply monitor the situation and independently verify any claims they made. Receiving or answering a call does not by itself mean that your personal information or accounts have been compromised.
If you provided sensitive information, however, take appropriate protective steps as soon as possible. The exact response depends on what information was disclosed. For financial information, contact the relevant financial institution using an official number. If an account password was disclosed, change it through the official website or application and make sure that important accounts use strong, unique passwords. If you provided a security code or other authentication information, contact the relevant service promptly and explain what happened.
How to Handle Repeated Calls From 44 800 009 3806
Repeated calls can become frustrating, particularly when the caller does not leave a meaningful voicemail or continues contacting you without explaining the purpose of the communication. If 44 800 009 3806 repeatedly calls and you do not recognize the number, you can consider blocking the number through your phone’s built-in call-management features. Many modern smartphones also provide options for identifying, filtering, or silencing certain unwanted calls.
Keeping a record of repeated unwanted calls can also be useful if the situation becomes more serious. Note the dates, approximate times, and nature of the calls, especially if the caller makes unusual claims or requests. If you believe the calls are fraudulent, threatening, or otherwise abusive, consider reporting them through the appropriate telecommunications, consumer-protection, or law-enforcement channel in your jurisdiction. Do not engage in prolonged arguments with suspicious callers, as there is usually little benefit in doing so.
Protecting Yourself From Unknown Callers
The safest approach to unfamiliar phone numbers is to develop a consistent verification habit. Do not allow the apparent identity of a caller to replace independent confirmation. If someone claims to be calling from a company you know, use the company’s official website, existing paperwork, or another trusted source to find contact information. Contacting the organization yourself provides a much stronger basis for determining whether the original call was genuine.
It is also useful to keep your personal information private and avoid sharing unnecessary details during unexpected calls. Even information that appears harmless can sometimes be combined with other information to create a more convincing social-engineering attempt. Treat unexpected requests for financial details, passwords, authentication codes, remote computer access, or urgent payments with particular caution. A calm and deliberate response is usually safer than acting quickly because a caller tells you that something is urgent.
Frequently Asked Questions About 44 800 009 3806
Who called me from 44 800 009 3806?
The number 44 800 009 3806 alone does not provide enough verified information to establish the identity of the caller. If you received a call from this number, consider whether you were expecting contact from a company or organization and check any voicemail or message left by the caller. If the caller claimed to represent a particular organization, independently verify that claim using official contact information.
Is 44 800 009 3806 a scam number?
The number itself should not automatically be labeled a scam without reliable evidence. An unfamiliar number can belong to a legitimate organization, a marketing service, an automated calling system, or an unwanted caller, and caller ID can also be manipulated. The safest approach is to evaluate the caller’s behavior and independently verify any claims before providing information or making payments.
Should I answer 44 800 009 3806?
You can choose not to answer an unfamiliar number. If you do answer, avoid sharing sensitive personal, financial, or security information until you have established who is calling and why. If the call is legitimate, the caller may leave a voicemail or provide information that you can independently verify.
Should I call 44 800 009 3806 back?
You do not necessarily need to call an unfamiliar number back immediately. If a caller claims to represent a company or organization, independently find that organization’s official contact details and use those details for verification. This is safer than relying entirely on information provided during an unexpected call.
What should I do if 44 800 009 3806 keeps calling?
If the calls are unwanted, you can block the number using your phone’s call-blocking features and keep a record of repeated contacts. If the calls involve threats, fraud attempts, or persistent harassment, consider reporting them to the appropriate authority or telecommunications provider.
Can caller ID be trusted completely?
No. Caller ID can be useful, but it should not be considered absolute proof of a caller’s identity. Because displayed numbers can sometimes be spoofed or otherwise manipulated, important requests should be verified through an independent and trusted communication channel.
Conclusion
Searching for 44 800 009 3806 after receiving an unexpected call is a sensible first step, but the number itself should not be treated as definitive evidence of who contacted you. The most reliable approach is to examine the context of the call, listen to any voicemail, look for independently verifiable information, and avoid sharing sensitive details until the caller’s identity has been confirmed. A number may appear familiar or official while still requiring verification, so caution is particularly important when the caller requests money, passwords, security codes, or immediate action.
Ultimately, the best response to an unfamiliar call is neither automatic trust nor unnecessary panic. Take your time, verify the caller independently, and use official contact channels whenever possible. Whether 44 800 009 3806 turns out to be a legitimate contact, an unwanted marketing call, an automated service, or something more concerning, following basic phone-safety practices gives you the best chance of protecting your information and making an informed decision.
Blog
LEGO Fallout: Everything You Need to Know About Fan Builds, Sets, and Future Possibilities (2026)
Published
2 months agoon
July 30, 2026
Table of Contents
ToggleThe Fallout franchise has become one of the most recognizable post-apocalyptic gaming series in the world. With its unique retro-futuristic style, unforgettable Vault Boy mascot, iconic Power Armor, mysterious Vaults, and expansive wasteland adventures, Fallout has inspired millions of players for decades. At the same time, LEGO remains one of the most beloved construction toy brands, encouraging creativity, engineering, and imaginative storytelling for builders of all ages. Because both franchises have passionate fan communities, many people regularly search for LEGO Fallout hoping to find official building sets, custom creations, or exciting news about future collaborations.
Although there are currently no officially licensed LEGO Fallout sets, the community has filled that gap with incredible fan-made models, detailed MOCs (My Own Creations), custom minifigures, and impressive recreations of famous Fallout locations. From Vault 111 entrances to detailed Power Armor stations, talented builders continue to demonstrate just how well Fallout’s distinctive aesthetic can translate into LEGO form. Interest has grown even further following renewed attention to the Fallout universe through new games, expansions, and television adaptations, leading many collectors to wonder whether an official LEGO partnership could eventually become reality. This guide explores everything you need to know about LEGO Fallout, including fan creations, custom models, possible future sets, collecting ideas, and why the combination continues to attract gamers and LEGO enthusiasts alike.
What Is LEGO Fallout?
The term LEGO Fallout generally refers to fan-created LEGO models inspired by Bethesda’s Fallout universe rather than official products. These creations are typically designed by experienced builders who recreate recognizable locations, characters, weapons, robots, and vehicles using standard LEGO bricks or custom pieces. Because Fallout features highly detailed environments filled with destroyed buildings, futuristic technology, and vintage-inspired architecture, it provides an ideal source of inspiration for creative LEGO designers.
The popularity of these fan-made projects has steadily increased over the years thanks to online communities that share building instructions, photographs, and design techniques. Some creators spend months perfecting large-scale Vault interiors complete with laboratories, living quarters, elevators, and security checkpoints, while others focus on miniature dioramas depicting famous moments from the games. Many builders also design custom minifigures representing the Lone Wanderer, Sole Survivor, Brotherhood of Steel soldiers, NCR Rangers, Super Mutants, Ghouls, and the instantly recognizable Vault Boy mascot. These impressive creations showcase both advanced LEGO building techniques and a deep appreciation for Fallout’s world-building, making LEGO Fallout one of the most exciting fan-driven crossover concepts in the gaming and construction communities.
Why LEGO and Fallout Are a Perfect Match
Despite belonging to different entertainment industries, LEGO and Fallout complement each other surprisingly well because both emphasize exploration, creativity, and imaginative storytelling. Fallout encourages players to venture through ruined cities, abandoned factories, underground Vaults, military bunkers, and radioactive wastelands while uncovering hidden stories through environmental details. LEGO builders naturally enjoy recreating complex environments brick by brick, making Fallout’s diverse locations ideal subjects for custom models.
Another reason the combination works so effectively is Fallout’s instantly recognizable visual identity. The rounded Vault doors, Pip-Boy devices, Nuka-Cola advertisements, rusted vehicles, Liberty Prime robot, Power Armor suits, and retro-futuristic architecture all translate beautifully into LEGO form. Builders can experiment with unique color combinations, weathering effects, mechanical details, and modular construction techniques to capture the atmosphere of the Fallout universe while still maintaining the playful charm associated with LEGO. This balance between creativity and authenticity explains why
LEGO Fallout remains one of the most requested gaming collaborations among fans worldwide.


Trending
 Lifestyle3 months ago
Amber the Colour: Meaning, Symbolism, Psychology, Uses, and Everything You Need to Know
- Art3 months ago
Easy Doodles: The Ultimate Guide to Simple and Creative Drawing Ideas
- Lifestyle3 months ago
SEO Title Ideas for the Keyword: “obituaries daily mountain eagle”
- Business3 months ago
FeedBuzzard: The Complete Guide to Features, Benefits, and How It Works
- Education3 months ago
Classroom 30X: The Complete Guide to Features, Educational Games, Benefits, and Safe Learning
- Entertainment3 months ago
How to Surf: The Complete Beginner’s Guide to Learning Surfing
- Business3 months ago
The Herd Live: The Complete Guide to Features, Benefits, and Everything You Need to Know
- Entertainment3 months ago
105.1 Music Playlist: Everything You Need to Know About Today’s Radio Hits